Last Updated 2021.02.03
How to set up amp for WP in detail – Design

This is a series of advanced settings for AMP for WP, a recommended plugin when using WordPress for AMP. This article explains the design settings.
In the advanced settings of Design, you can fine-tune the parts related to the design of the AMP-based website. The HTML standard for AMP projects has also been expanded considerably in 2021 to enable a variety of AMP-compatible designs. AMP for WP pays, but sells AMP-enabled design themes. A new design theme built into AMP for WP has been added, changing from a simple design theme at the beginning of the plug-in release to a fairly designable theme.

AMP for WP Advanced Settings – Design
When the AMP for WP plug-in settings menu opens, click the Radio button in Advance Setup to switch to advanced settings in Advance Setup.
Then open the Design screen.
AMP for WP Advanced Settings – Themes
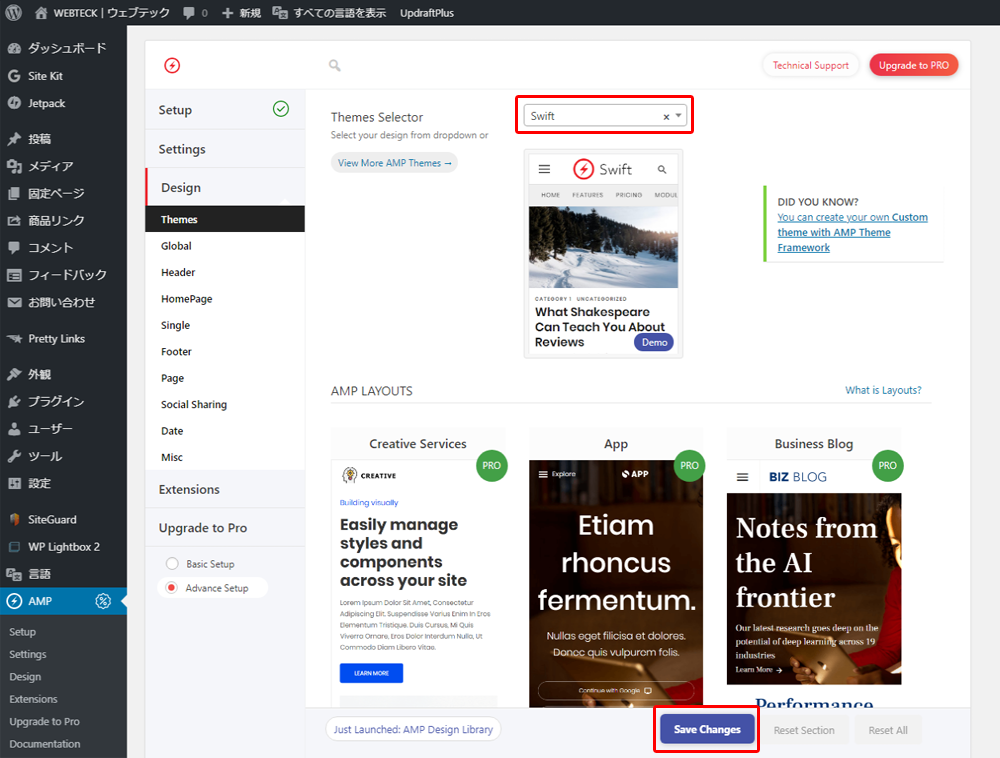
Select an AMP-enabled design theme in Themes Selector. A new theme called Swift has been added. This theme is more design-rich than the three themes that have been set since its release. Initially, I chose "Design Two", but "Swift" was very designed, so I chose to use "Swift". If you are reading this article, I think that it is good to make it "Design Two" or "Swift".
AMP for WP Advanced Settings – Header
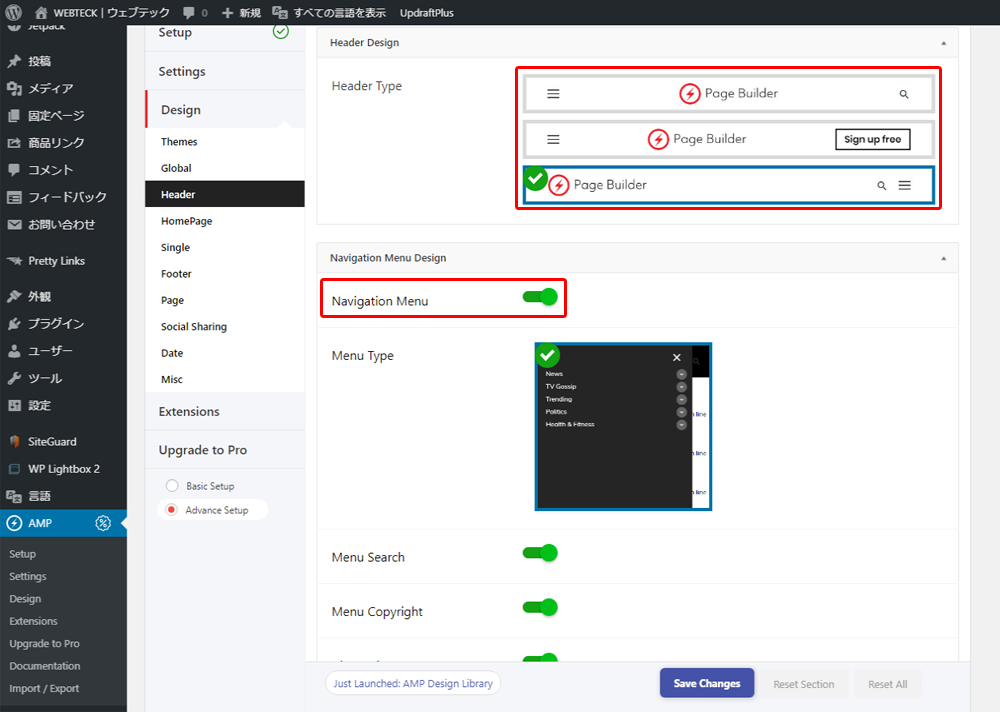
Header Design should choose a usability-based header layout. This site chooses the third layout that is laid out on the left for headers and right for menu search forms. If you want to bring the header to the center, I think the first layout is easy for users to use.
Navigation Menu is a global menu on a PC site. This setting is recommended on.
Menu Search will add a search form at the bottom of the menu. It should be noted that the search results themselves are in-site searches, not Google searches. Google search is preferable given usability, but we look forward to improvements around here in future updates.
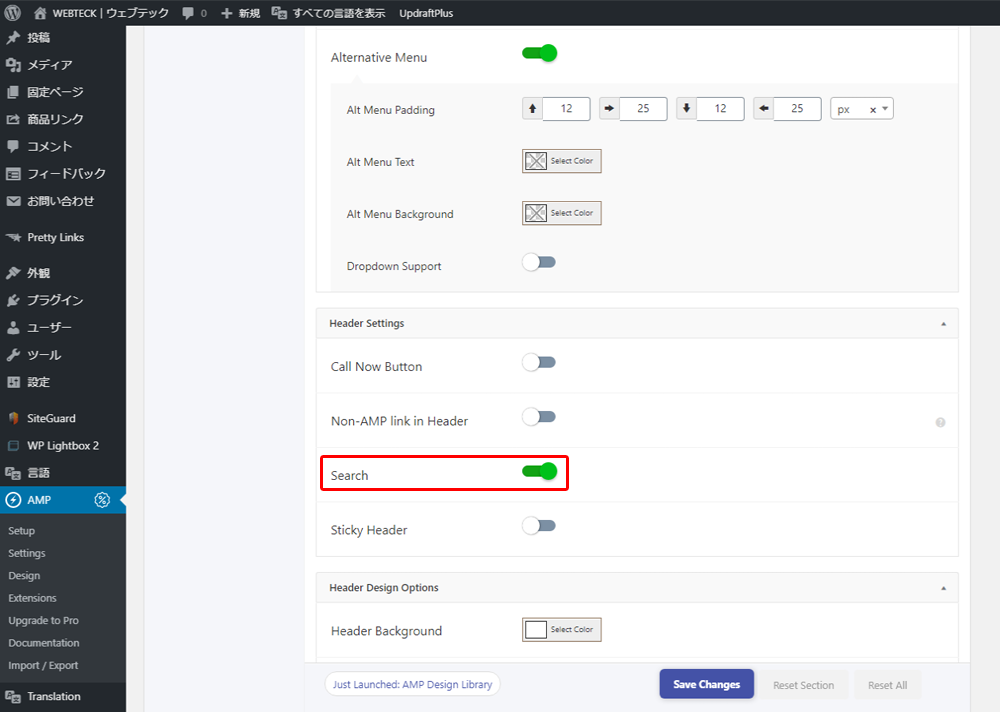
Search is enabled for settings in the Header Settings box. The effect of the feature is to add a button to open the menu box, as well as an icon button to open the search form in the header. If you don't want your site search to stand out too much, you can turn it off. Since the search form overlaps with the menu, this Search setting is optional according to the web operator's policy.
Don't forget to "Save Changes" when you change the settings at the end.
AMP for WP Advanced Settings – HomePage
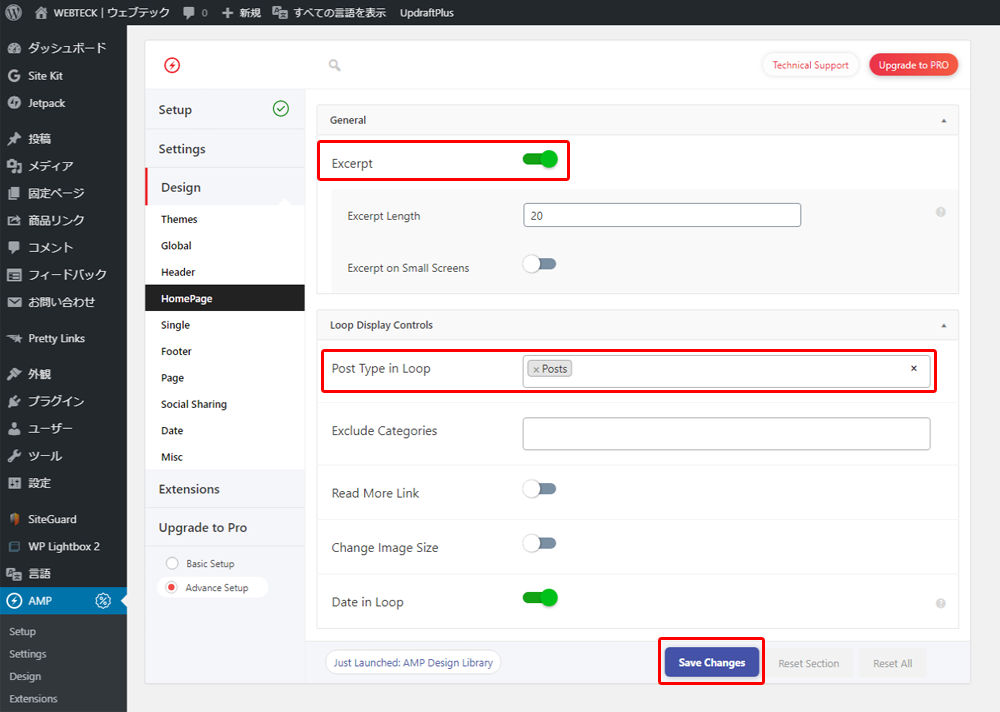
In the General setting of HomePage, if Except (excerpt) is turned on, the specified number of characters is displayed out of the excerpt sentence set for each post.
The Post Type in Loop in Loop in Loop Display Controls can be Post_tag posts or loops. Normally, there is no problem with Posts. Loop Display Controls seems to be a process for the list of articles displayed on the top page. I haven't looked into this area very much. I think that there is no problem with the default.
AMP for WP Advanced Settings – Single
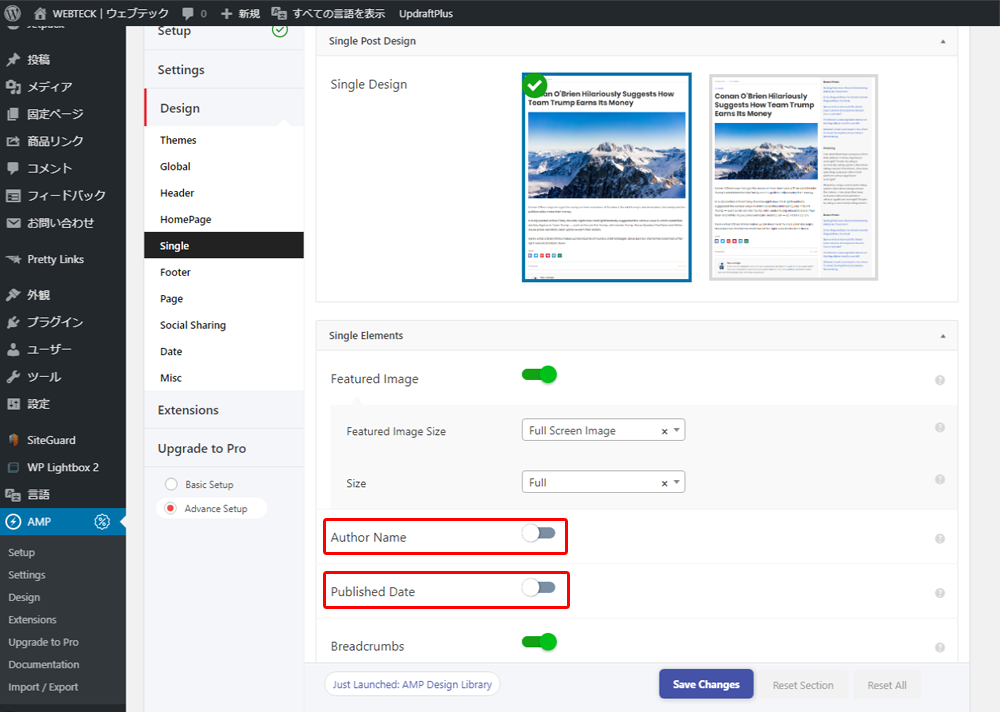
In single settings, I think the Single Elements item will be important.
The settings you'd see in the Single Elements section are:
Featured Image Size
Author Name
Published Date
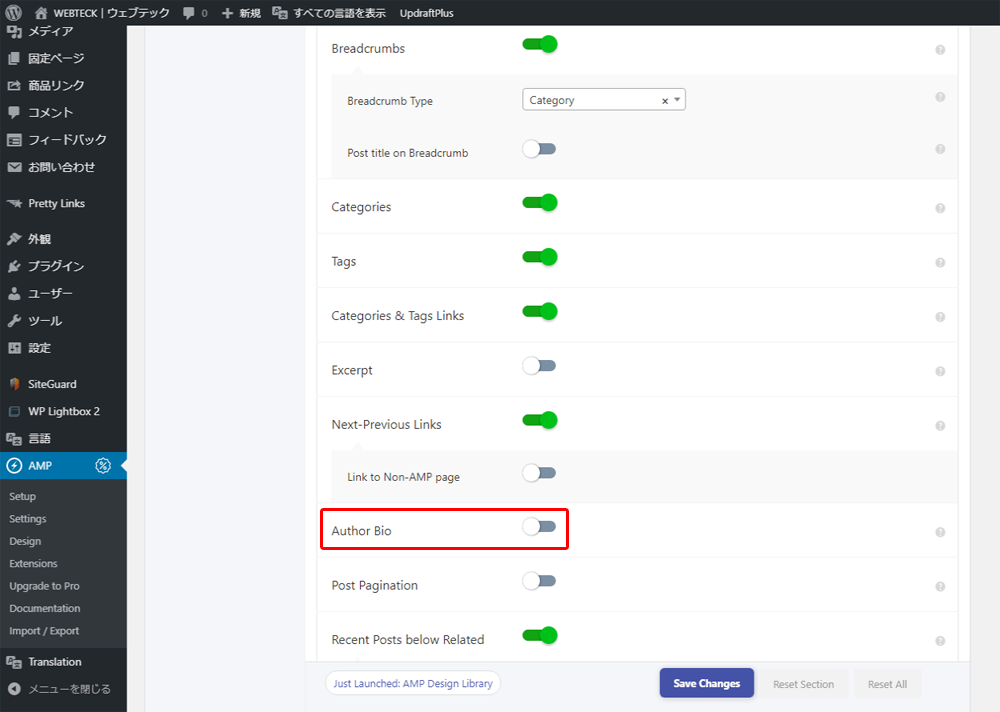
Author Bio
It will be.
Featured Image Size is the size of the article's featured image and is full screen by default. If you want to look responsively on a mobile device or tablet, I think this Full Screen is no problem. Or, by setting it to match the width of the content and fixing the width of the eye catch (header) image to the content width, I think the idea is to get the user to move to the content text as soon as possible. I think that the way of displaying it will change depending on whether this is an image that is necessary for eye-catching images to attract, or an image that does not make much sense just to decorate the article.
Author Name displays the name of the contributor, or administrator. It is fine if the administrator is set separately and the user who posts the article is set separately, but if you are posting an article by an administrator user, the administrator account may be unders been available for the security of the website. In addition, it is often inconvenient for this contributor to be posted when operating as a media site rather than a personal blog. This site has this Autor Name turned off.
Published Date is the post date. If it is a site like news media, it is fine to post the post date, but if it is an ordinary magazine media site, it does not make much sense to post the post date. This publisher date is off for this site.
Author Bio uses Chrome's "Translated into Japanese" as "author biography". This is also a function related to the contributor's name, so it is turned off.
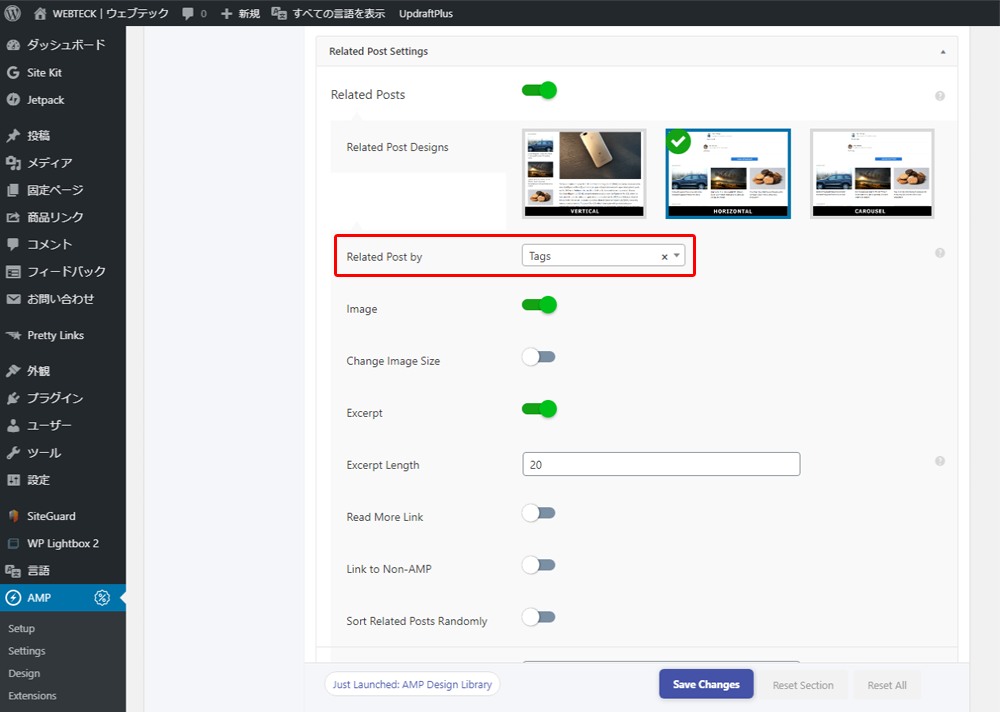
Related Post Settings is a feature setting that displays a list of related posts.
When Related Post by is "tag", posts associated with the tag you set when you posted will appear in the list and become more relevant to the article that the user is looking at. Recommended settings. Also, setting Related Post by to tag creates randomness for related posts that appear.
Sort Related Posts Randomly When this setting is turned on, related posts appear randomly associated with Related Post Settings. However, sites with a large number of article posts will affect the performance of your website, so be careful when using them.
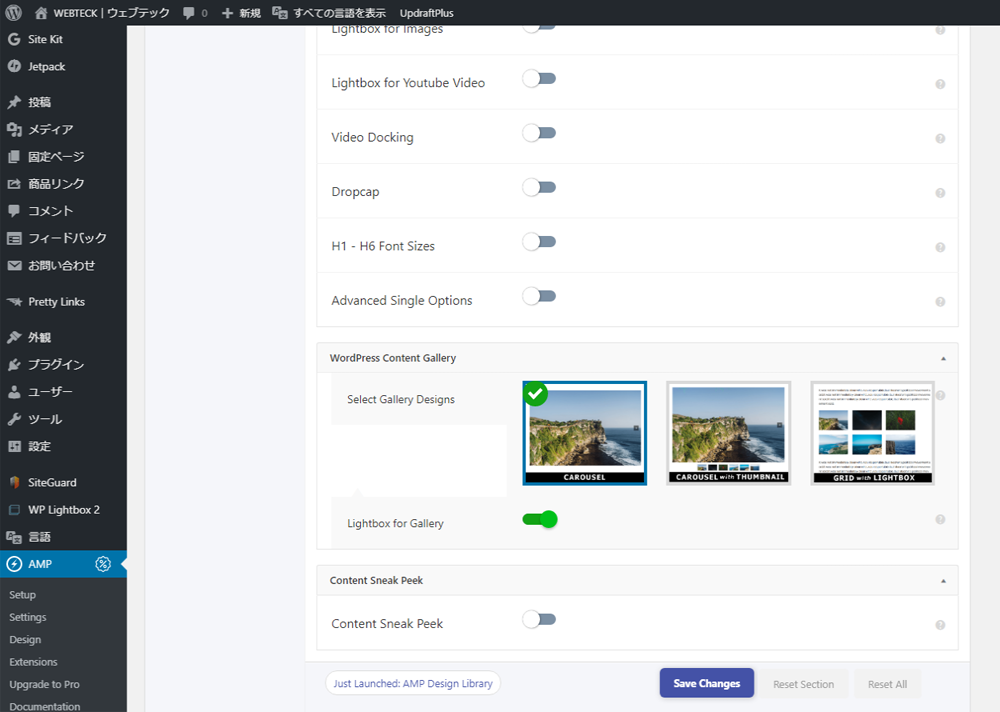
In the General section, there are no specific items to set. I don't think it's necessary to set it because it's an action on an image or video posted in an article, or because it's an action on an H tag. If you are interested, I think that it is good to turn it on one by one and see what happens to the display of the article.
The display test is
https://Your Domain/amp/
You can also see the website on your PC.
WordPress Content Gallery
Content Sneak Peek
I don't think you need to set up any of the above two sections as well. It remains the default and is fine.
AMP for WP Advanced Settings – Footer
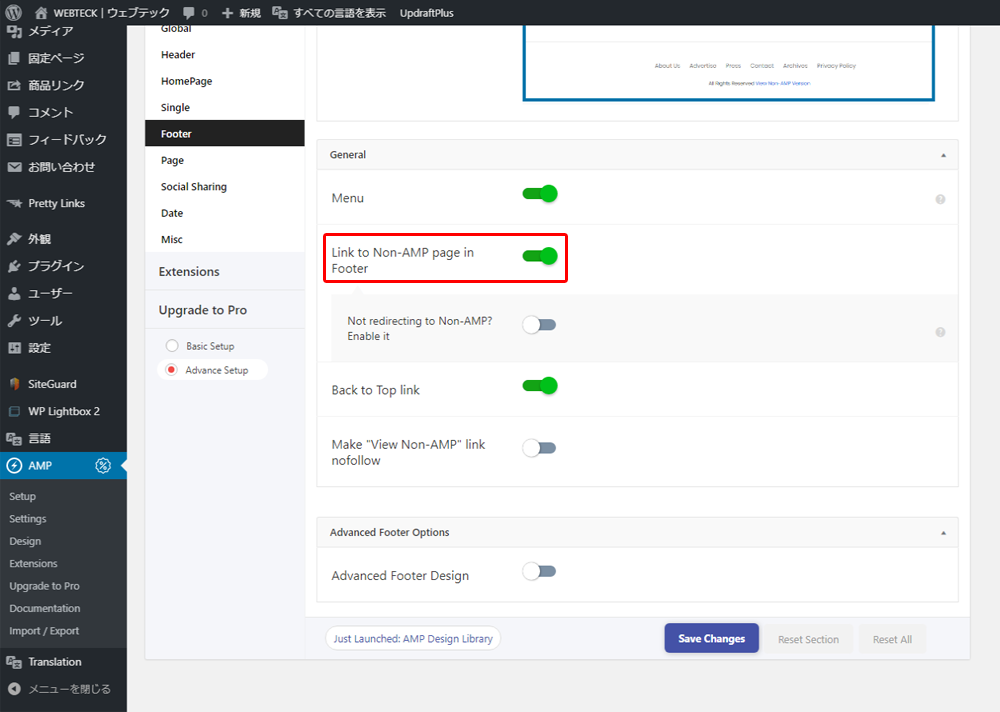
In Footer, the General section
Link to Non-AMP page in Footer
it is recommended to turn on . The reason is that in the settings so far, we have introduced settings to increase the tour rate in / amp / , but it serves to connect the link of the entire website by providing an exit to the website of the normal design in the footer.
AMP for WP Advanced Settings – Social Sharing

Social Sharing displays the SNS share button below the article.
Turn on Social Share in the Social Settings section to display the SNS share button.
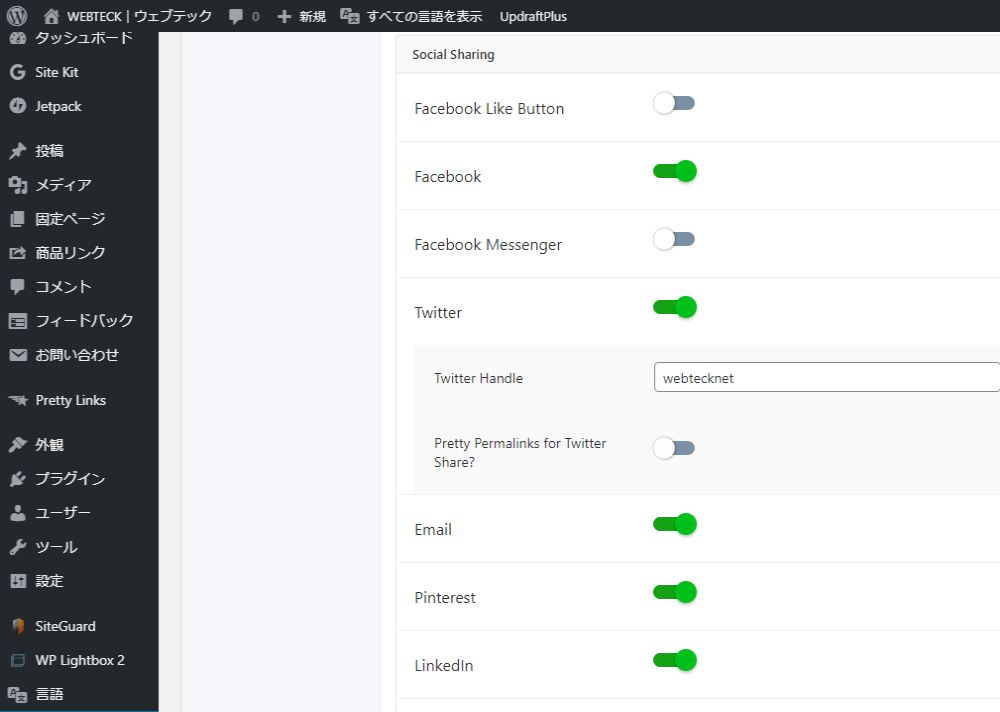
Select the SNS you want to view in the Social Sharing section.
Basically
Facebook
Twitter
Line
Whatsapp
Wechat
Hatena Bookmarks
As for the above, I think that there is no problem with the feeling that the rest is a preference as an activation essential.
This is the detailed setting of AMP for WP – the configuration description of Design.
The other setting items will be pro settings for paid services. I have explained the settings of AMP for WP twice, but if you look at this article, I think that your website can also be AMP. When testing the display of amped sites on a PC,
https://Your Domain/amp/
So let's display /amp/ after the URL. There is also a test site for AMP pages provided by Google, so I will put it in the link below.
