Last Updated 2021.01.28
Easy Way to Set Up WordPress – CORE SERVER (CORESERVER)

WordPress used to download zip files, unzip zip files, upload them to web servers via FTP, edit config .php files with text files, and install them with complicated steps, but now rental servers of each company have easy setup methods, Since the manual is also substantial, even if it is a special server or there is no knowledge of PHP, WordPress can be easily set up, and anyone can easily build a highly functional WordPress website.
In this article, I would like to explain how to easily set up WordPress on the core server I am using.
Create a new Database for MySQL
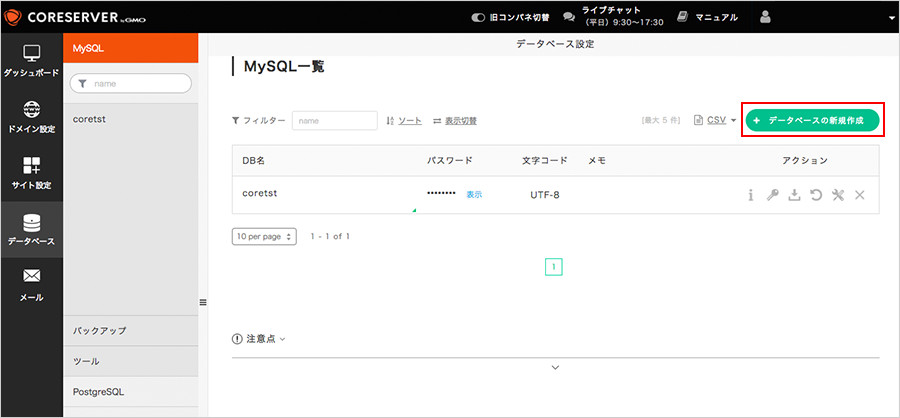
The core server management screen was updated at the same time as the server update in 2017, and it is an easy-to-understand management screen with excellent usability. Click "Database" in the left header of the management screen, and when you are in the list of "MySQL", click the "Create New Database" button.
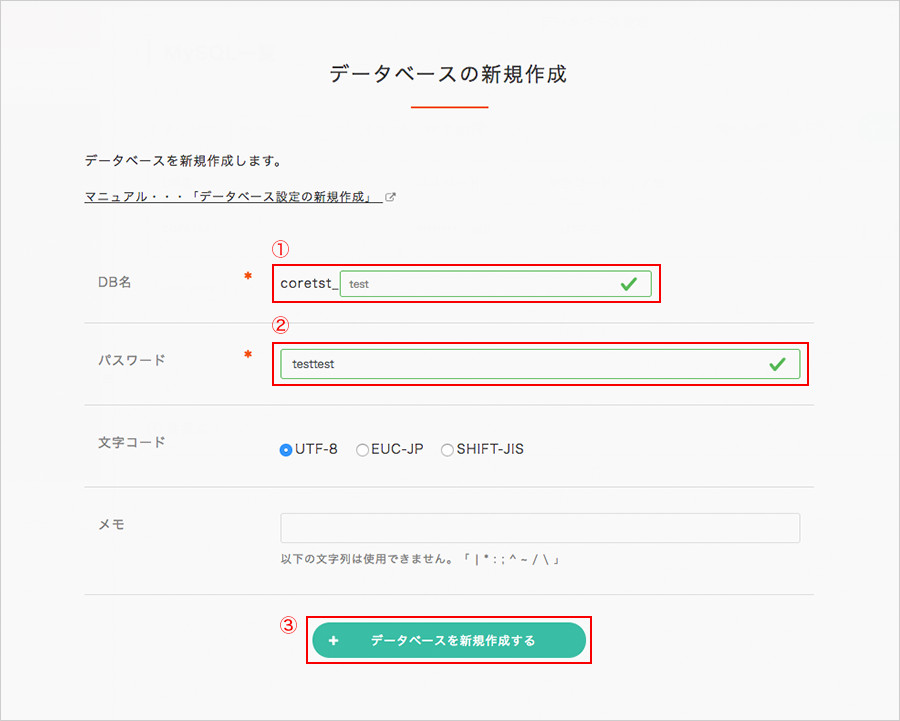
When the new database creation screen appears, set "DB name", "password", and "character code".
Note that "DB name" and "character code".
The DB name is the account name of the core server_ any DB name. It should also be noted that the account name of this core server_ any DB name will also be the username that accesses the database.
DB name: coreservername_dbname
User name: coreservername_dbname
It comes to. This will be the information you need when setting up WordPress easily, so let's make a note of the text file etc.
Character code utf-8 if you want to operate WordPress
For character codes, select utf-8, which is selected by default.
When operating WordPress, in the past, the character code of the database was not a problem with either UTF-8 or EUC-JP, but now "UTF-8" is recommended. Character code is the type of processing code of strings handled on the server, but this is specialized, so I will not use it in this article. If you are interested, you may want to search Google with keywords such as "character code", "UTF-8", "EUC-JP", etc.
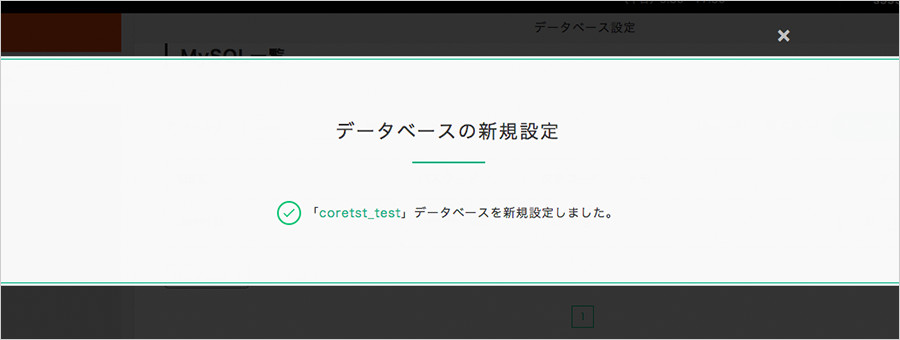
When you click the new database button and the database is successfully created, you will see a window similar to the one shown above, so close this window and you are done.
Source image and reference site
Install wordpress
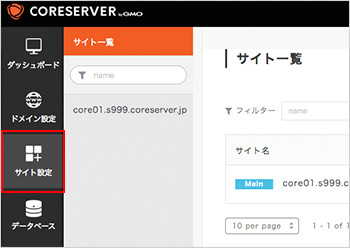
Now, let's start installing WordPress. First of all, to decide which website to install WordPress on, select the website where you want to install WordPress from the site settings. Click "Site Settings" in the left menu of the Management Screen.
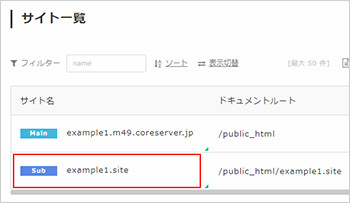
When the "Site Settings" screen opens, select the domain of the website where you want to install WordPress.
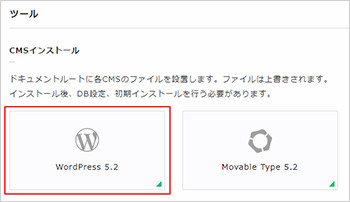
When you can go to the advanced settings screen of each domain in "Site Settings", press the button marked by the "WordPress" icon at the bottom of the screen.

Since it will be the setting screen of the path of the wordpress installation destination, select the domain name to install WordPress in the pull-down.
WordPress is installed in the domain top directory
https://Your Domain/ Directly Below
It will be.
Once you have selected the domain where you want to install WordPress, press the "CMS Install" button.

If the WordPress installation succeeds successfully, you will see the "CMS Installation" success window as shown above. As the note says, it takes about 5 minutes before it can actually be accessed from a web browser. After a while, access it from a web browser.
Source image and reference site
Access WordPress from a web browser

In a web browser (Chrome, FireFox, etc.),
https://Your Domain
Access the . Then, the setup screen of WordPress will come out.
If you click the "Let's start" button in the lower left, it will be the setting screen of the database as shown above.
| Database name | Enter the database name that you created. |
|---|---|
| User name | Enter the database name that you created. * On the core server, the database name is also the user name |
| Password | Enter the password you set when creating MySQL. |
| Database host | Localhost |
| Table prefix | Any half-width alphanumeric characters |
Table prefixes are items that must be set when installing multiple WordPresses in a single database. Even if you install one WordPress in one database, you can safely set the table prefix. For example, if you set the table prefix "wt" to this site WEBTELK, multiple tables such as "wt_XXXXX" will be created when wordpress installation is completed. If you do not understand the translation, I think that the problem will not occur if you set the prefix after the domain name where WordPress is installed.
Enter localhost to host the database. This is the setting of the host that accesses the database from WordPress, and "localhost" means access from inside the server. This is usually the localhost.
Click the "Send" button and WordPress will start connecting to the database. If you successfully connect to the database, you will see an "Run Installation" button at the same time as the Connection to Database Success dialog. When you press the "Perform installation" button, the table required by WordPress is automatically created in the data base. This process can be completed in tens of seconds at the earliest or minutes at the earliest.
Source image and reference site
Set up wordpress administrators
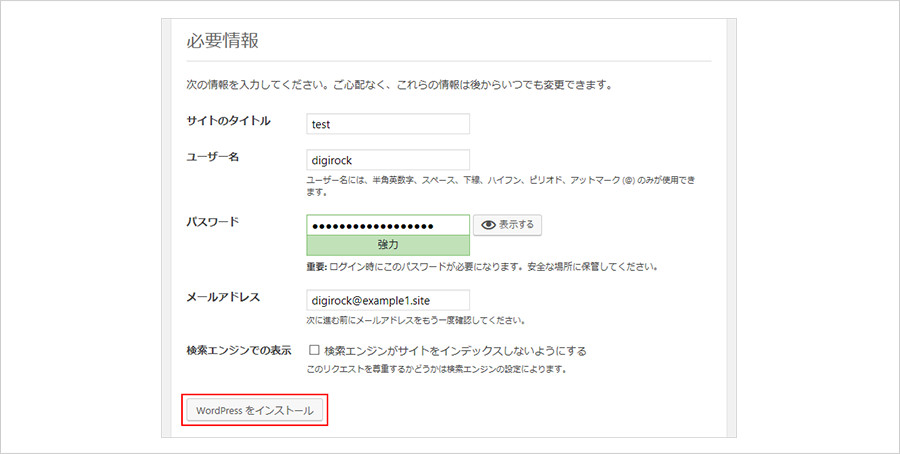
Set up an administrator to log in to WordPress.
| Site title | Set any title name. |
|---|---|
| User name | Set any user name. ※ Half-width alphanumeric is desirable |
| Password | Set any password. (Please make a note as it is required when logging in.) ) |
| Email address | Available email addresses |
| View in search engines | I don't usually check it. |
Site Name: This can be easily changed from the "General Settings" in the Management screen where you have finished installing WordPress in the title of the site.
Username: You will be an administrator of WordPress. This is not easy to change, so make a user name that is easy to understand in half-width alphanumeric characters.
Password: WordPress is prone to cracking. Passwords should be a mixture of complex half-width alphanumeric characters and symbols.
Email address: In WordPress, an email address is an important means of notification. Enter a valid and using email address. It's also a good idea to have a new Gmail for WordPress management.
View in search engines: Do not check this if it is normal. If you do not want search engines such as Google to recognize the content even if you publish the content to show the display of the site to the client at work, check it. Unless there are special circumstances, we will not check it.
Gmail account creation page
When you have finished entering the necessary information, click the "Install WordPress" button.
When the final setup of WordPress is complete, you will see a "Successful" screen.
Click the "Login" button to log in to the WordPress management screen.
Source image and reference site


