Last Updated 2021.02.04
Easily Back Up & Restore WordPress Sites – UpdraftPlus & Google Drive
When you launch a WordPress site and operate it smoothly, the next thing you need to think about is backing up the WordPress website. WordPress site backup has the advantage that the rental server can restore from the backup data if there is some trouble and data is lost.
And it is desirable that wordpress backup and restore is easy and automatic. A plug-in that responds to such requests is the UpdraftPlus plug-in introduced in this article. This UpdraftPlus plug-in is a very useful plug-in that automatically backs up everything after setup is complete. A long time ago, a plug-in called BackWPup was the number one download, but now this UpdraftPlus is the top of the list. Let's talk about UpdraftPlus right now.
InstallIng UpdraftPlus
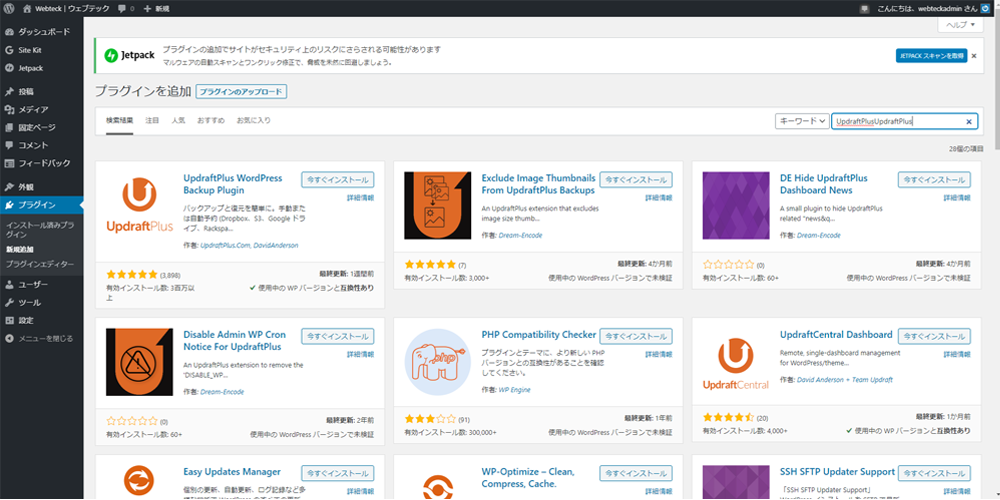
Click the left menu "Plug-in" → "New" in the WordPress management screen, go to the plug-in new addition screen, enter "UpdraftPlus" in the plug-in search form, and "Install" the UpdraftPlus plug-in. When the installation is complete, press the "Enable" button to activate the plug-in.
UpdraftPlus Settings
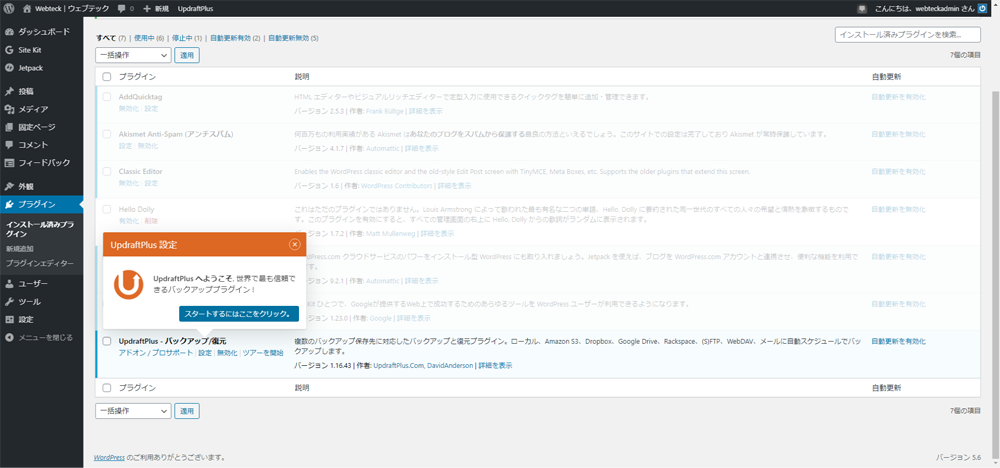
When the UpdraftPlus plug-in is installed, a pop-up wizard will be launched that says let's set it to the plug-in list screen. We'll follow this pop-up wizard to set it up. Click the Settings link.
Backup schedule
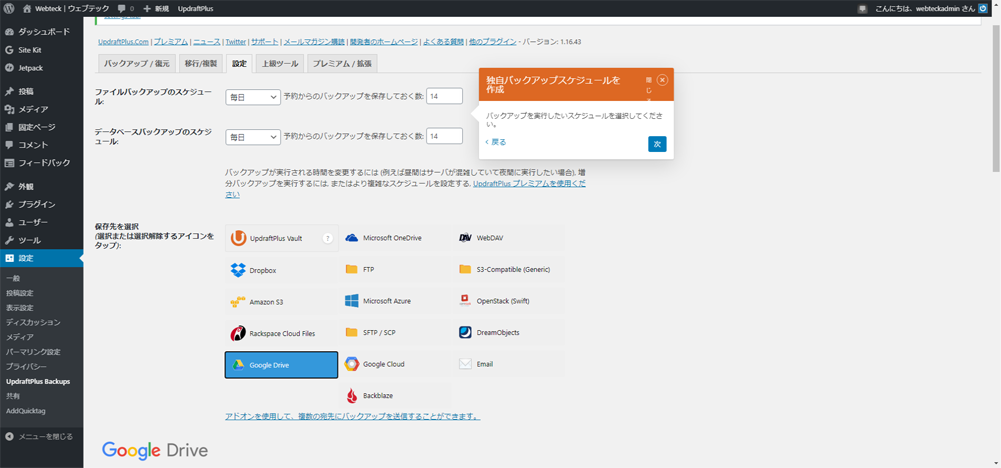
File backup schedule
Schedule database backups
Set the above items. In this field, you can set how often you want to get backups and save the past few backups. In this site, the backup is "every day", and the number of backups stored is "14" for 2 weeks. The number of backups stored depends on the free space of Google Drive and the capacity of your WordPress site, so I think it is good to set the appropriate number. By the way, google drive has 15GB capacity.
Back up to Google Drive
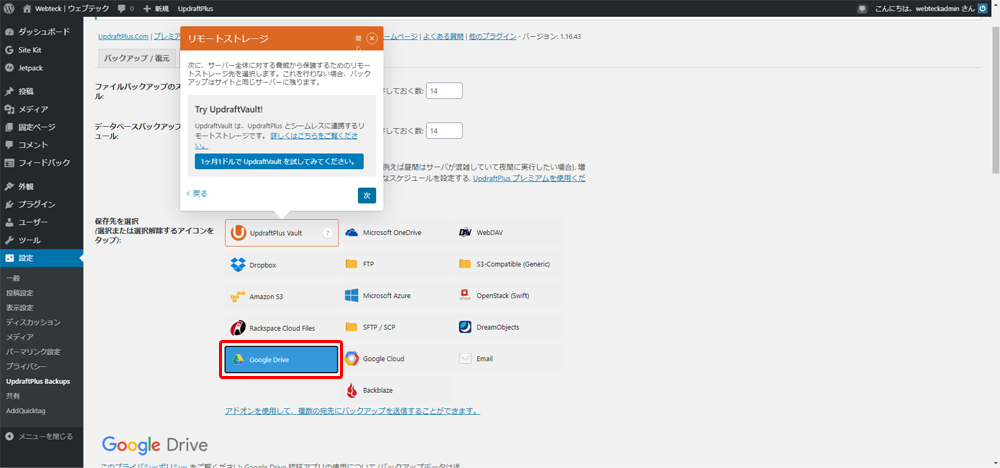
Next, set the backup destination. The recommendation of this site is Google Drive. If you get a new Gmail account at the time of launching the WordPress site and set it up in the administrator's email address, you can use Google Drive 15GB. The idea is to make effective use of Google Drive.
Save settings changes
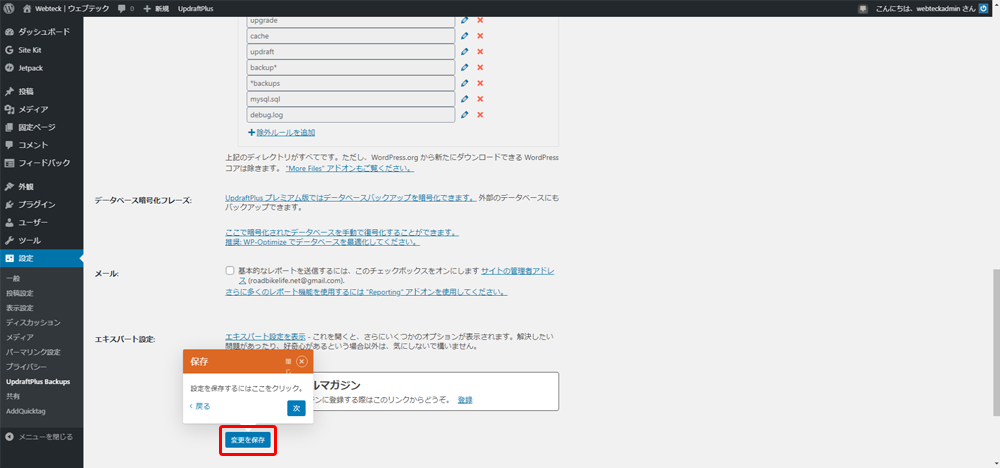
Save the settings so far. UpdarftPlus is half finished with the settings so far. From now on, it will be the setting of the connection to google drive selected in the backup destination.
Set up a Google Drive connection
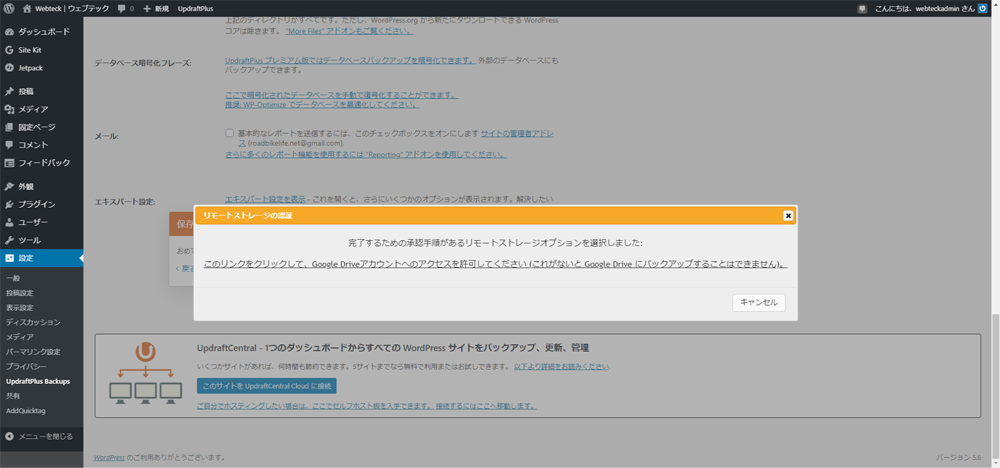
When you save your settings changes, you'll see a pop-up window that prompts you to set up a connection to Google Drive. If you do not complete the connection settings in Google Drive, the backup data will not be saved in Google Drive, so next time you will start setting up the connection of Google Drive.
Sign in and connect to Google
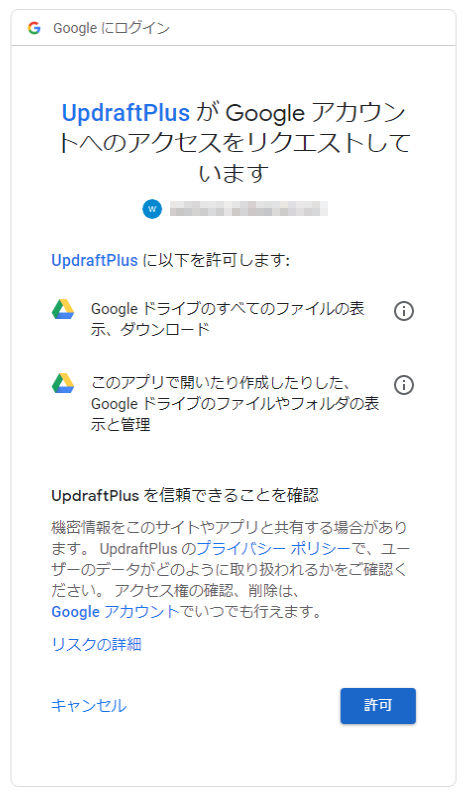
Click the link in the UpdraftPlus connection to Google Drive pop-up window to access the window of permission settings to connect to Google Drive as shown above. If there is no problem reading the privacy policy, etc., press the "Allow" button to proceed with the process.
Complete backup settings
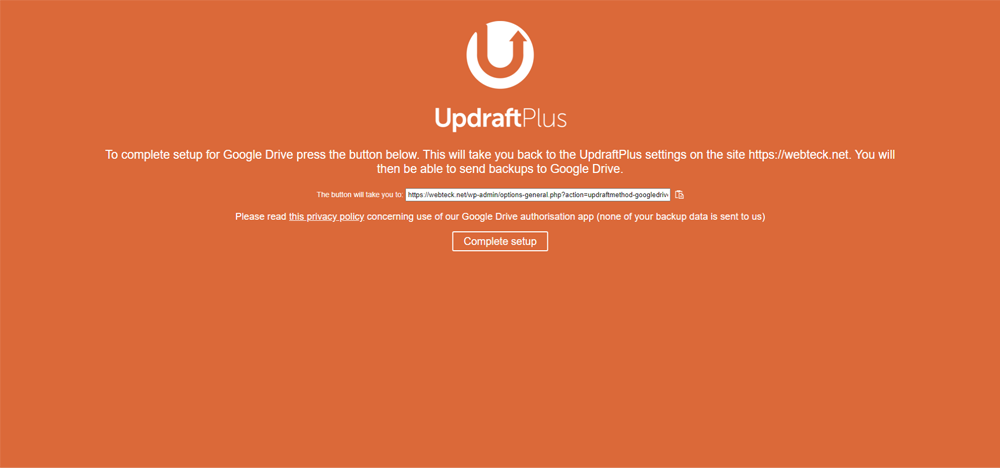
When the connection setting with Google Drive is completed safely, the setting completion screen as shown above will be displayed. Click the Complete Setup button.
You can then return to the UpdraftPlus settings screen.
Check backup settings
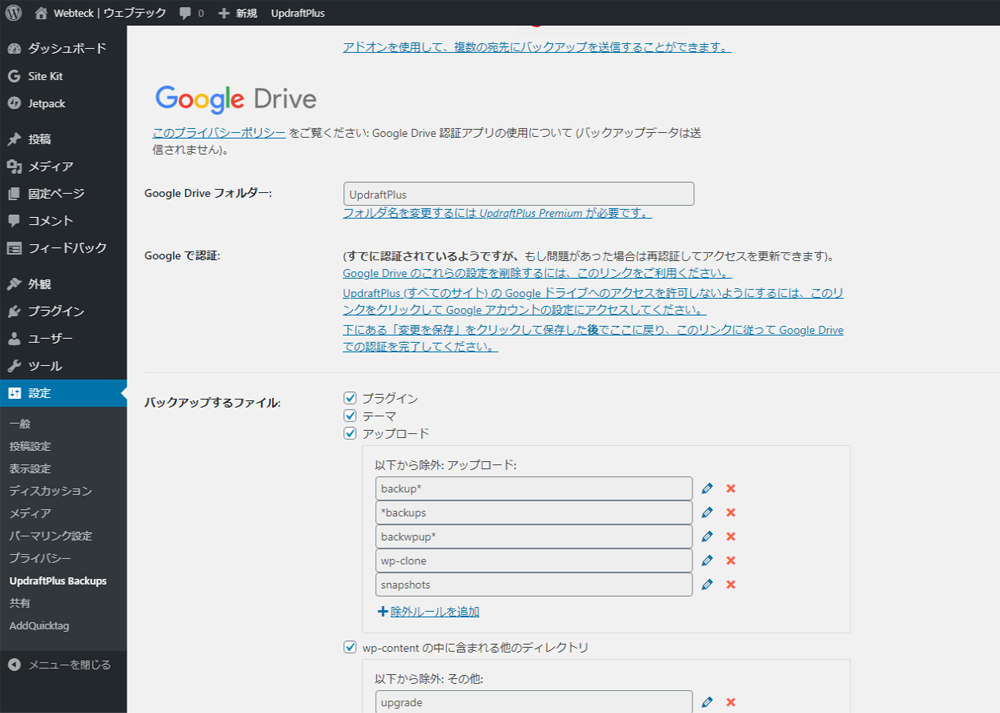
As shown in the screen above, you can see the settings for the files to be backed up and the files to be excluded. You do not need to change the settings that are normally checked by default and the file folders that are excluded. If there is a possibility of migrating servers in the future, you may want to set up a backup of everything.
Start the first backup manually
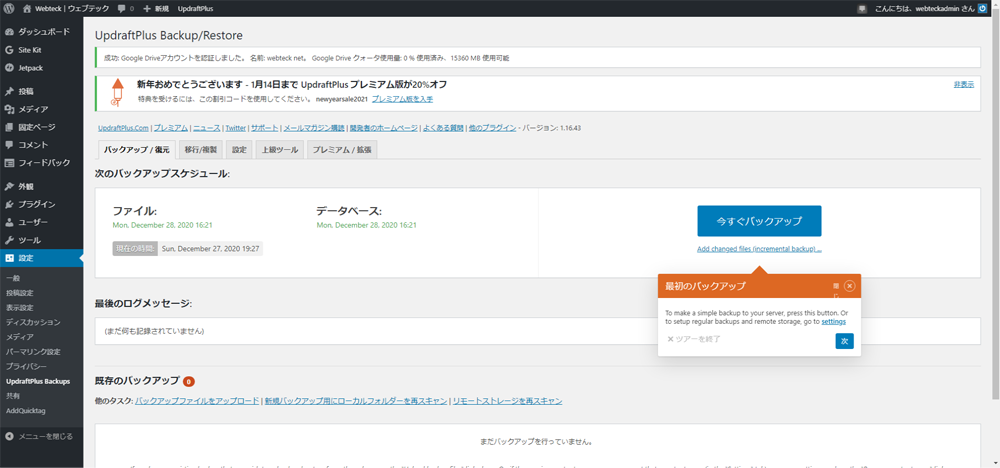
Once all the UpdraftPlus configuration is complete, the first backup must be started manually. This will start setting up automatic backups in the future. If the time zone is prime time, you should start this backup manually during periods when the network is relatively free, such as in the middle of the night or in the morning.
Start a new backup
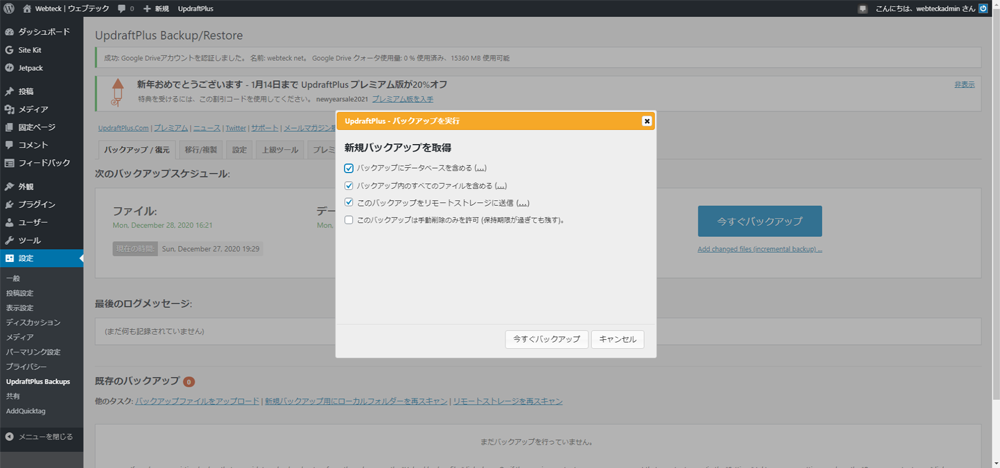
A pop-up window appears for new backup acquisitions. This checkbox is usually the default. If you want to leave only this backup, check the last checkbox as well. Then press the "Back up now" button to start the backup.
Check the progress of new backups

Once the UpdraftPlus backup has started, you can see the progress as shown above. When you start a website with WordPress, the backup is completed in a few minutes, but if the number of articles and images increases, it will take about 10 to 30 minutes. However, please be assured that the website of the table will be displayed as usual while the backup process is taking place. The display may be slow due to a slight load on the server.
Backup complete
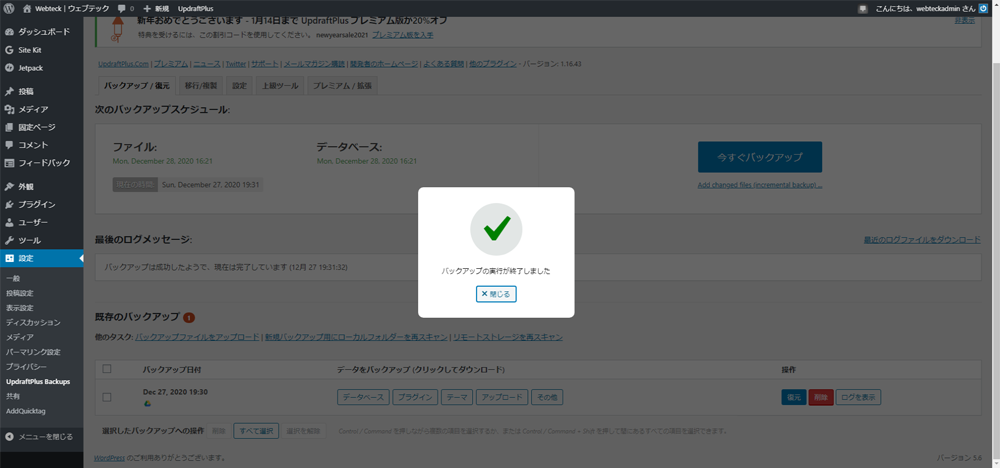
The first backup is complete. In the future, administrators do not need to worry because they will automatically take backups according to the schedule set above. It is not known if you will notify the administrator's email address if you cannot take a backup due to something abnormal, server maintenance, etc.
※ Because there is no abnormality of backup until now.
In Japan, wordpress site backup is BackWPup, but in the world, UpdraftPlus is one stronger. If this article is helpful and you haven't backed up yet, or you're looking for a more functional backup plug-in than BackWPup, please refer to it.


